Was this helpful?
Join our Discord community to ask questions, give feedback, or suggest improvements.
Join Discord[ RELATED ]
Join our Discord community to ask questions, give feedback, or suggest improvements.
Join DiscordRecord POV allows you to record a single player's perspective across multiple rounds. This is perfect for studying a specific player's style, creating highlight reels, or doing individual performance reviews.
This guide is divided into two parts: technical setup requirements and how to use the recording module.
To automate recordings, CS2.CAM uses the CS2 Workshop Tools to send commands to the game console. This is the only technical requirement before you can start recording.
Launch Steam and navigate to your Library.
Right-click on 'Counter-Strike 2' in your library.
Select 'Properties' from the context menu.
Click on the 'DLC' tab in the properties window.
Check the box for 'Counter-Strike 2 Workshop Tools'. Steam will download them automatically.
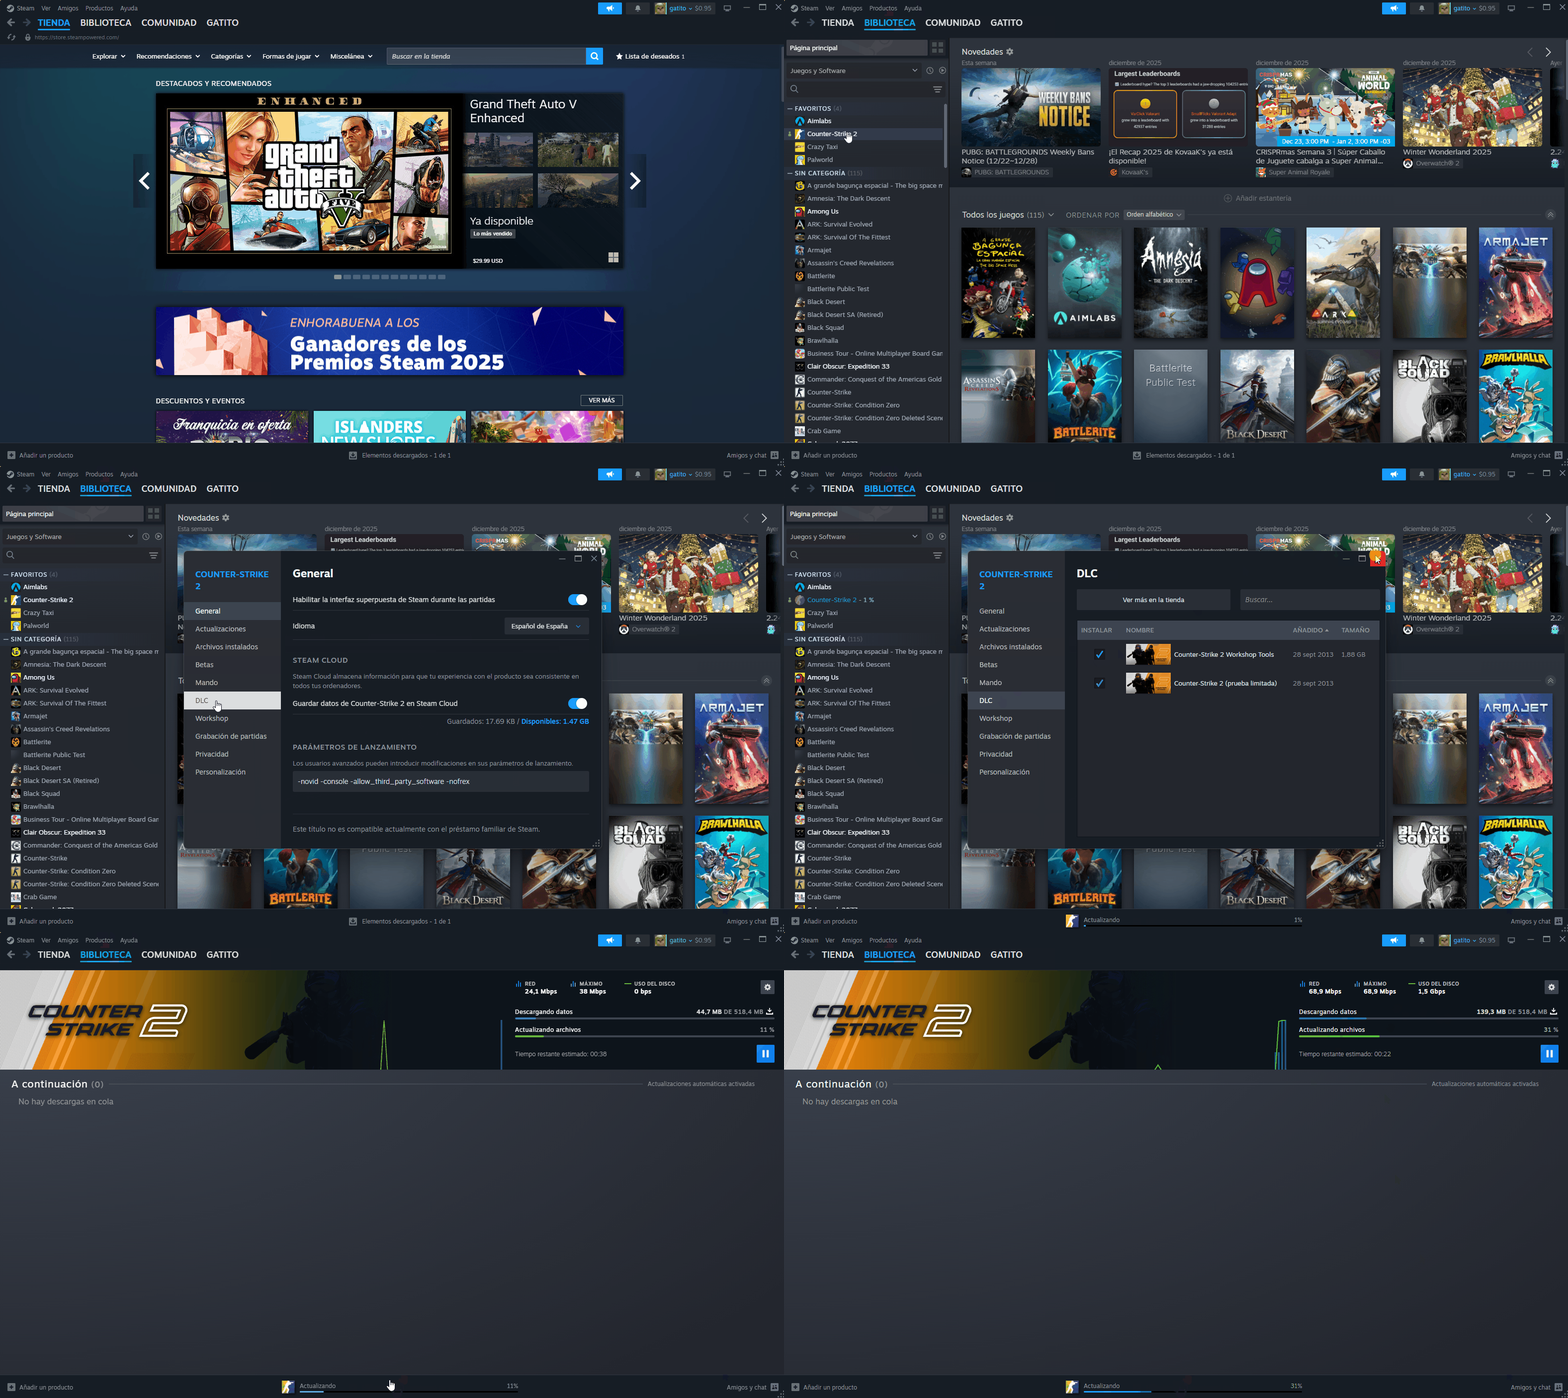
Installing CS2 Workshop Tools from Steam
Need visual help? Watch our video tutorial
That's all you need! If you want to customize OBS settings, check out the Recording Overview
There are two ways to add POV recordings to the queue:
While viewing any round in the 2D viewer, click the recording icon in the toolbar. Select the 'Record POV' tab, choose a player, select the rounds you want to record, and add them directly to the queue.
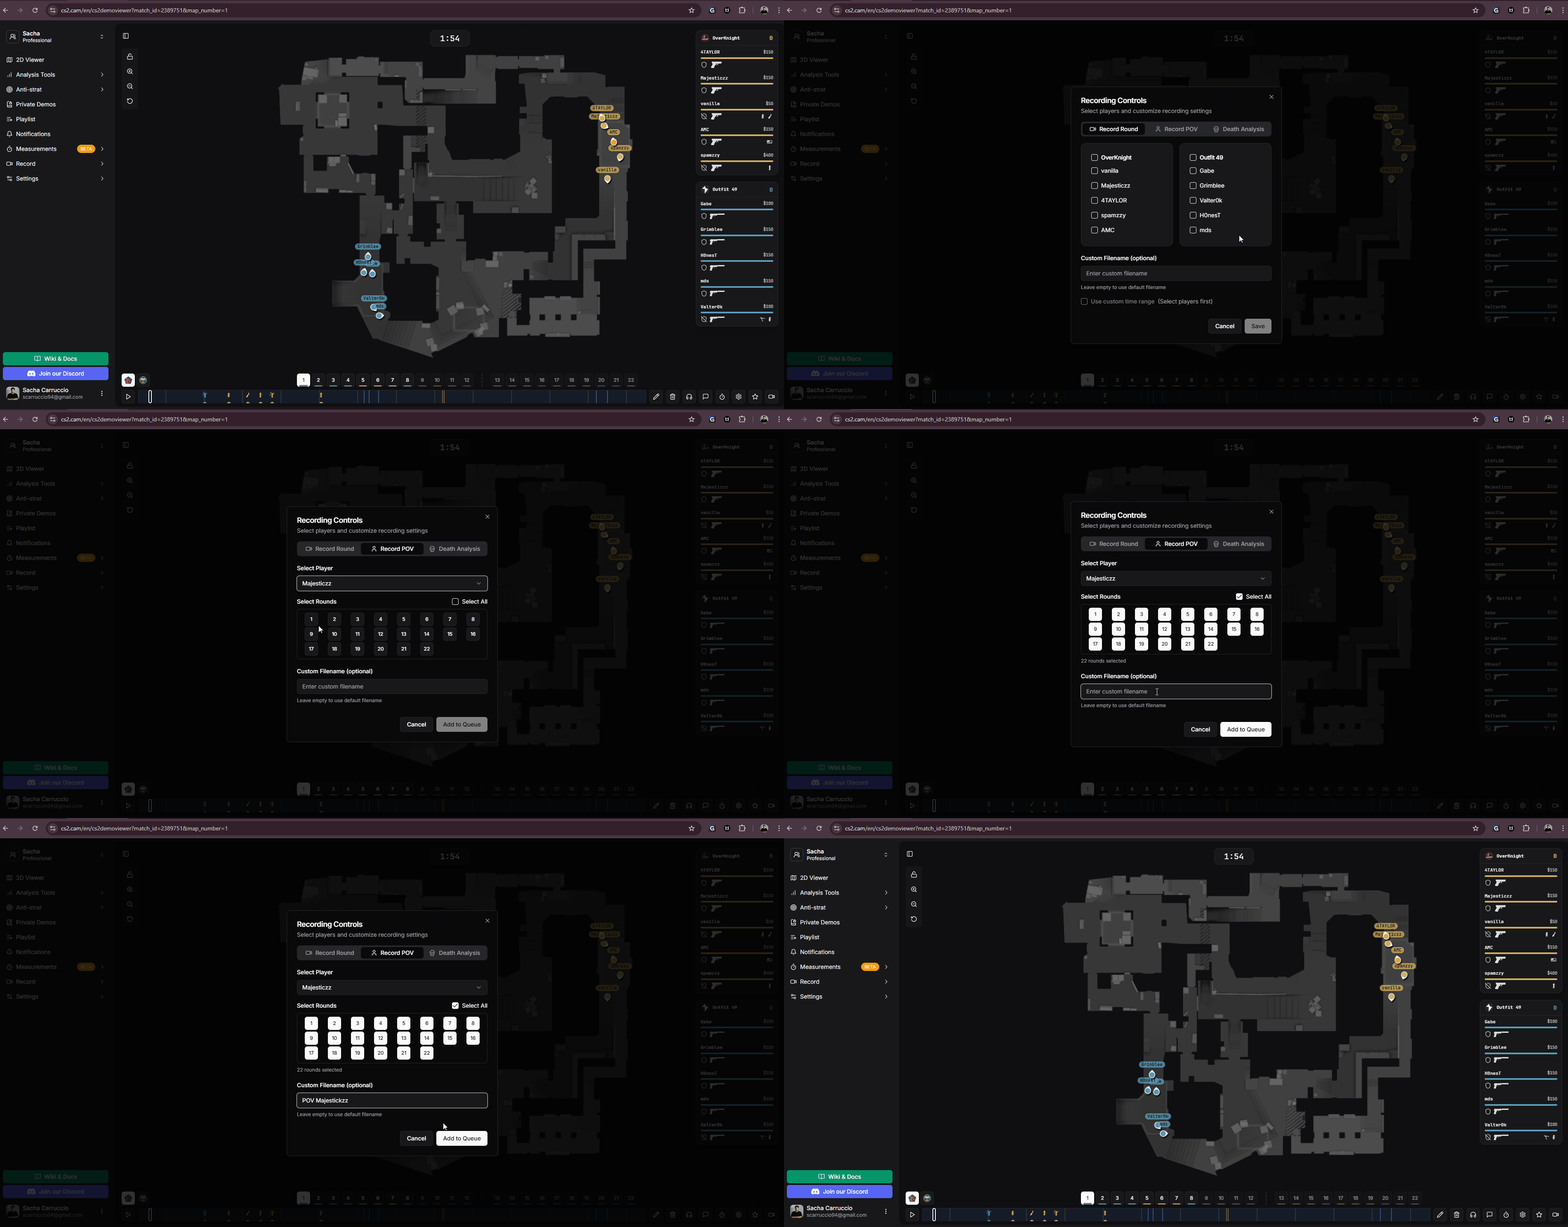
Adding POV to queue from the 2D viewer
From the Record POV page, analyze demos you've already downloaded. The demo selector shows all demos in your CS2 folder plus any custom folders you've configured. Select a demo, click 'Analyze Demo', then choose the player and rounds to record.
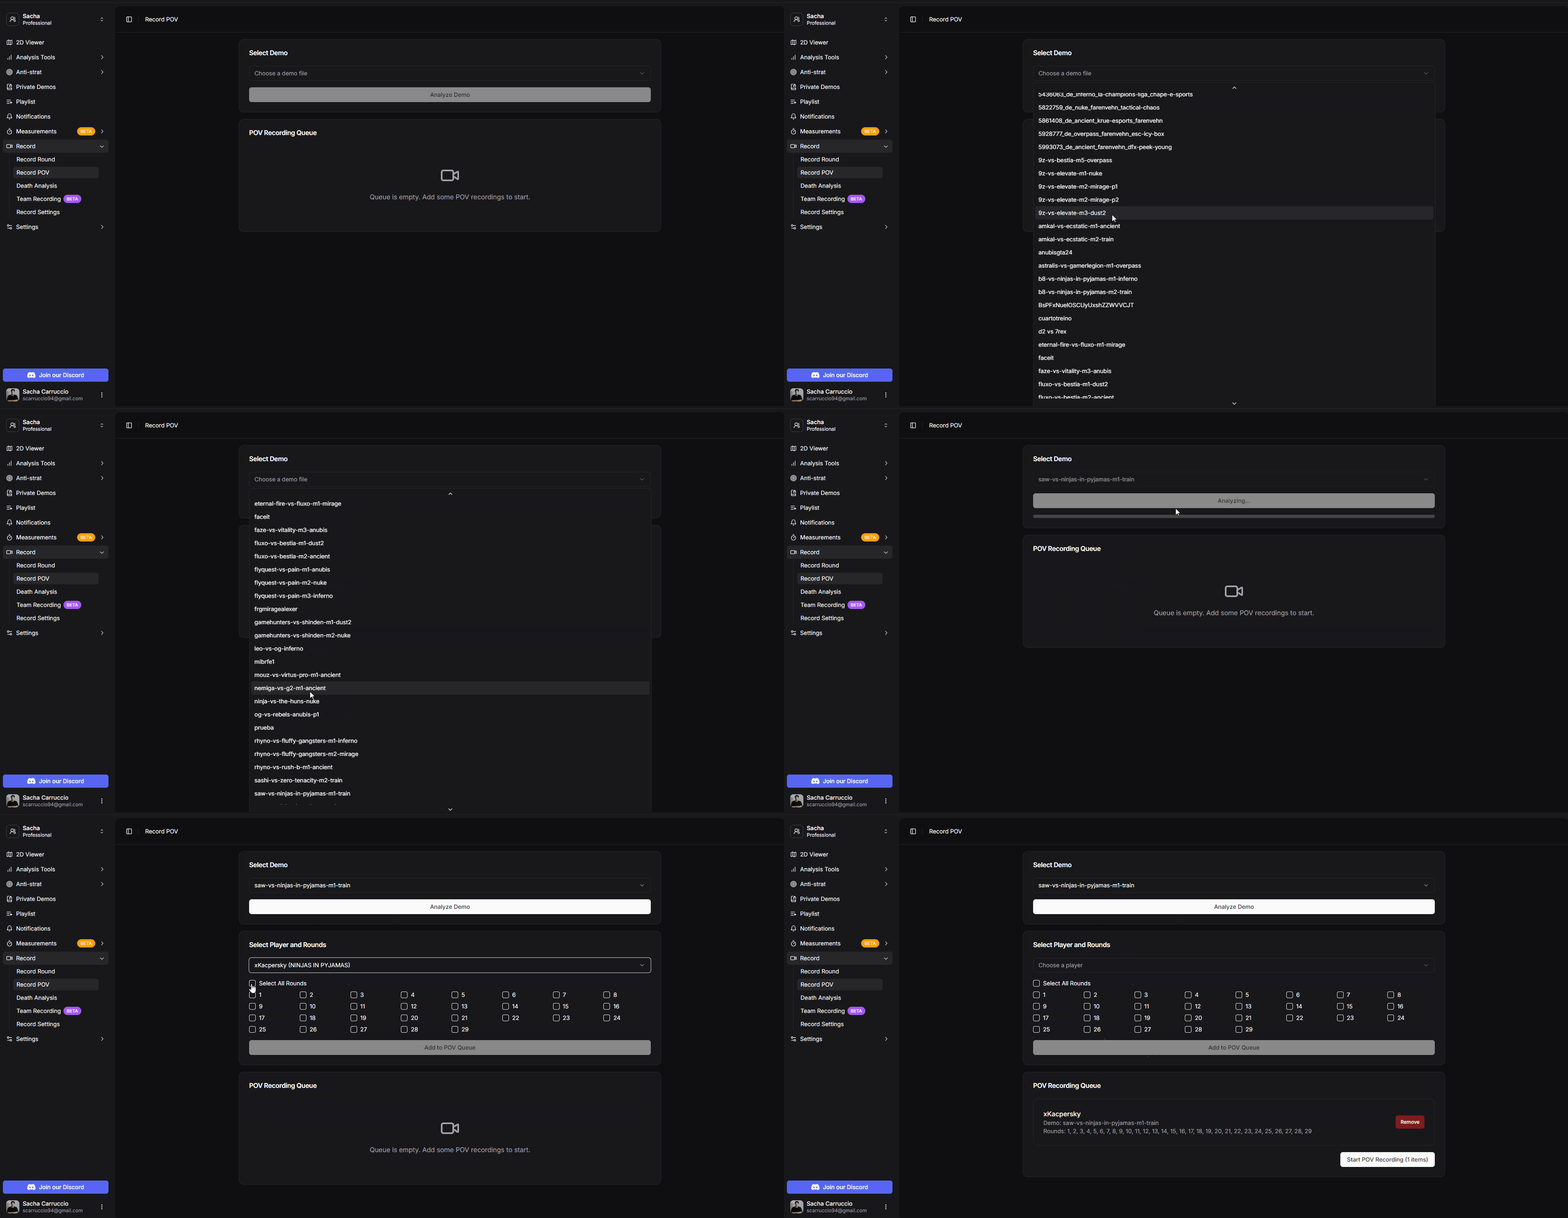
Adding POV to queue from the demo analyzer
Once you add a POV to the queue, CS2.CAM handles the entire recording process automatically. Here's what happens step by step:
The portable OBS Studio opens with pre-configured settings.
If enabled in settings, the portable HUD overlay is launched.
CS2 opens with the correct launch options. Don't worry - it always launches with -insecure for safety.
The demo file is loaded and navigates to the round start tick.
OBS begins recording the gameplay.
The selected player's perspective is recorded for all chosen rounds.
Once all rounds are recorded, OBS stops the recording.
The complete video is saved along with a text file containing round timestamps.
CS2, OBS, and the HUD are closed. If there are more items in the queue, the process repeats.
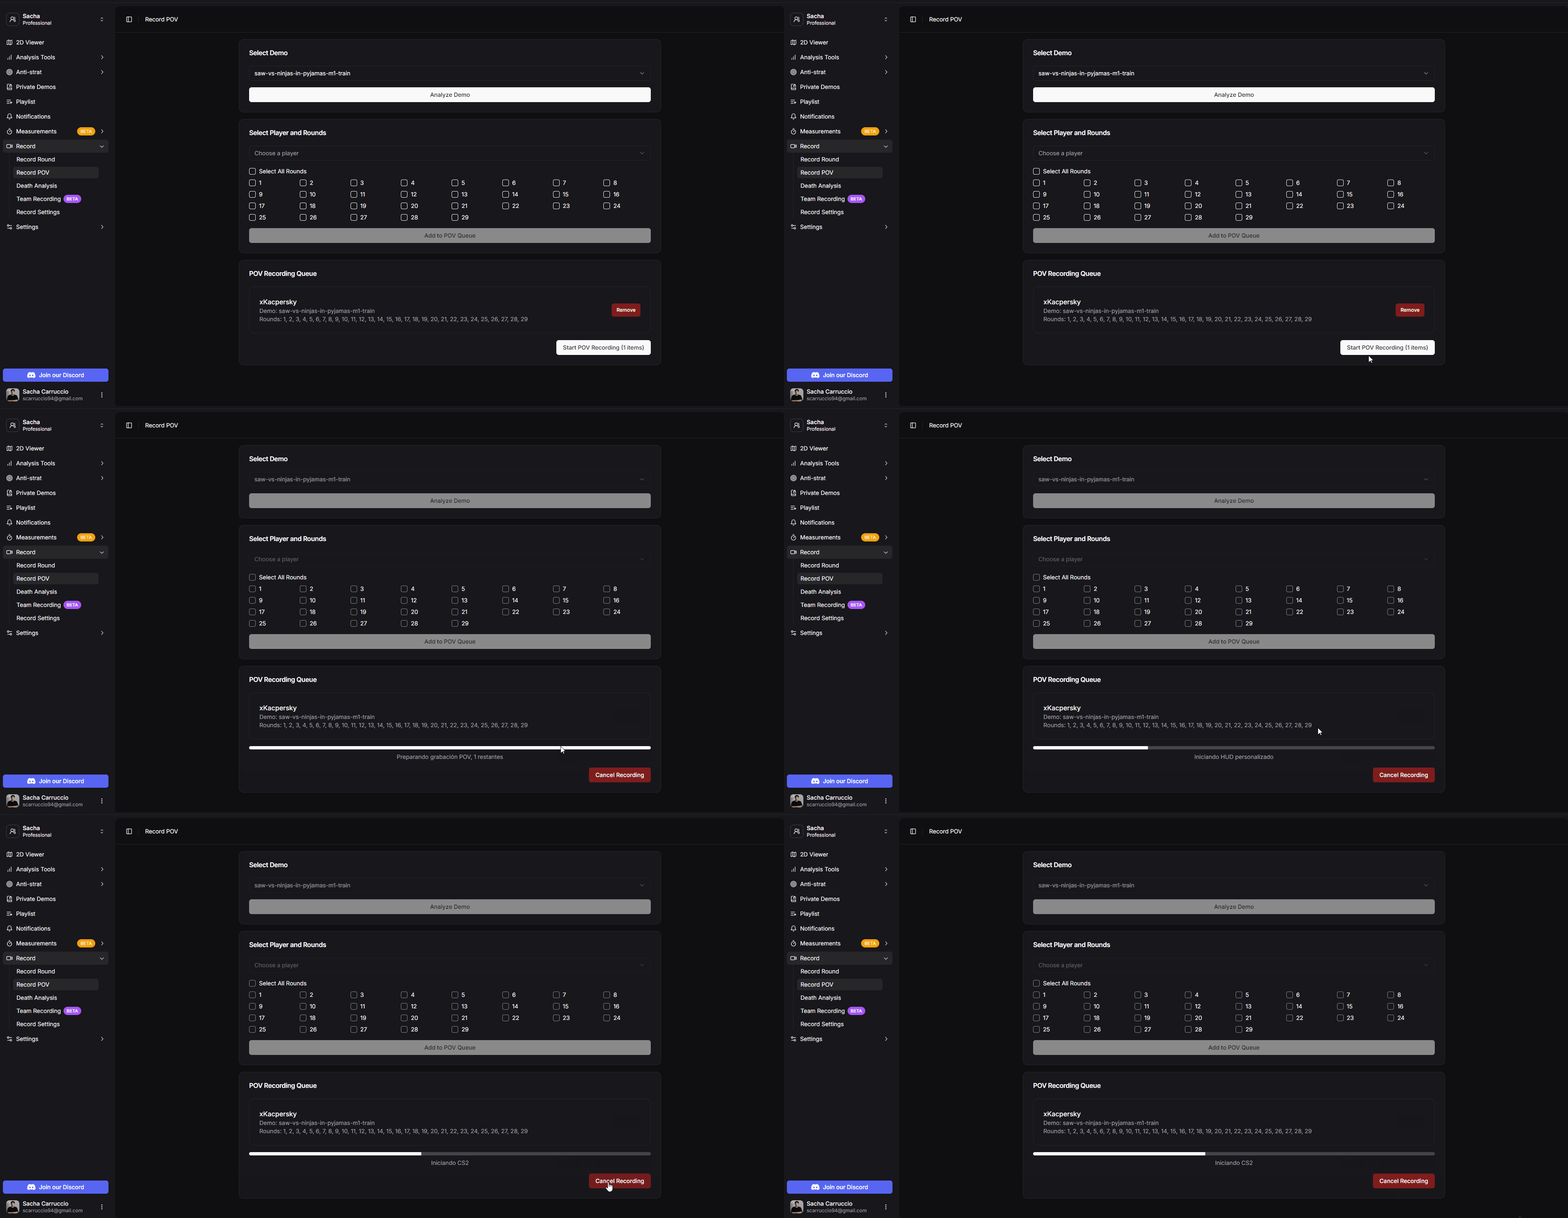
POV recording process preview
Watch the complete POV recording process with no cuts:
Full POV recording process demonstration
After recording completes, you'll find two files in your output folder:
The complete POV recording of the selected player across all chosen rounds.
A text file with round timestamps and metadata, ready to paste into YouTube descriptions.
Example timestamp file content:
POV Recording - story
Demo: saw-vs-ninjas-in-pyjamas-m1-train.dem
Rounds: 2
0:00 Round 1
0:22 Round 2
This is what the final recorded POV video looks like, ready to upload to YouTube or wherever you want:
Final result of a POV recording
You can queue multiple POV recordings and let CS2.CAM process them all automatically. Perfect for batch recording player highlights or full match POVs.
Want to see what POV recordings look like in action? Check out this YouTube channel that uses CS2.CAM to record professional player POVs:
A channel dedicated to professional CS2 player POVs recorded with CS2.CAM.
Premium users have access to dedicated support to help with any recording issues:
Free technical support through our Discord server for any problems you encounter during the recording process.
Optional one-on-one session where we explain the entire process and teach you how to use all the recording tools effectively.